A Three-Image Walk Through a Familiar Street
A three-image walk turns one familiar street into three distinct photographs by shifting the visual anchor, helping you notice how framing directs attention.
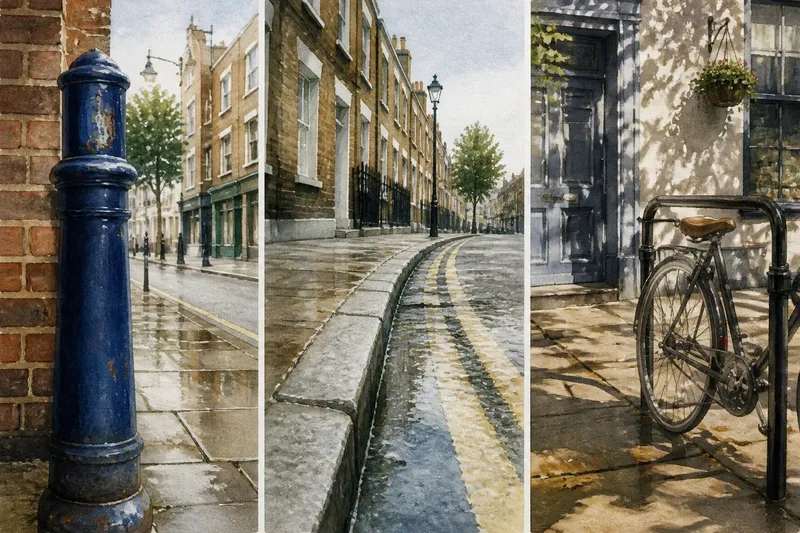
On a familiar street, the red post box may be the detail you pass without seeing, while a wet paving stone catches the sky at your feet. A three-image walk uses one simple constraint: photograph the same stretch three times, choosing a different visual anchor for each frame. The result is not a record of everything there, but a small exercise in how composition asks the viewer to look.
Keep the route short and the pace easy. Use a phone or camera you already know, and make pictures from places where you can stand without blocking anyone. The point is to notice choices, not to collect a polished set.
What counts as a visual anchor?
A visual anchor is the feature that gives a picture its first point of attention. It might be a bright doorway, a repeated row of windows, a person waiting at a crossing, or the line where buildings meet the pavement. An anchor need not be the largest object; contrast, position and isolation can make a small detail lead.
Before each frame, ask what you want a viewer to notice first. Then consider what should remain visible around it. A photograph can include plenty of detail and still feel clear if the parts support one another; it can also feel crowded when several strong elements compete for the same attention.
For this walk, choose anchors that differ in kind as well as location. A single object, a line or pattern, and a human-scale moment make a useful trio because each encourages a different framing decision. If one category is absent or uncomfortable to photograph, choose another feature that changes the way you organise the scene.
How do you choose three different anchors?
Walk the block once without taking a picture. Notice what repeats, what interrupts the pattern, and where light or movement changes the street. This first pass helps you avoid making three versions of the same obvious view.
- A single object: Find a sign, drainpipe, shop shutter or bollard with a clear outline. Ask whether the object can carry the frame without losing its connection to the street.
- A leading line or repeated form: Look for kerbs, railings, paving joints or windows that guide the eye into the distance. Choose a viewpoint where their direction is easy to read.
- A moment of use: Consider a bicycle locked to a rail, a queue at a bakery or a shadow falling across a doorway. The human activity can be suggested without making a stranger the subject.
These are prompts, not requirements. A quiet residential road might offer no shopfront or passing activity; a school street may be busy enough that you would rather avoid photographing people. Choose what the place offers and what feels respectful to frame.
How can each frame feel distinct?
For the first image, let the object anchor lead. Move close enough for its shape and surface to register, but leave some context: a strip of pavement, a doorway behind it, or the street receding to one side. If the background has a bright sign or a cluster of hard-edged shapes, shift your position until those elements stop competing.
For the second, make a line or rhythm do the work. A low viewpoint can make a kerb run strongly towards a corner; a more level position may let windows or railings repeat across the frame. Keep the camera level if leaning it would make walls appear to topple, unless that tilt is an intentional part of the image.
For the third, let a moment or relationship become the anchor. You might frame a bicycle against the curve of a railing, or wait for a shadow to touch the edge of a doorway. Look for an interaction between elements rather than adding a person simply to make the scene seem lively.
Say you walk past a narrow row of brick shops and first choose a blue street sign as your anchor. You frame it with the brickwork and the road visible behind; then you photograph the receding kerb from a lower position; finally, you use a parked bicycle and the railing around it as a quiet point of attention. The expected result is three pictures of the same stretch that feel different because each gives the viewer a different first task.
What should you change between pictures?
Change one main decision at a time when you can. If you alter your distance, angle, lens setting and exposure together, it becomes harder to tell which choice changed the picture’s emphasis. A small shift sideways may remove a distracting overlap; a step back may give a lone object enough setting to feel connected to its place.
Check the edges before pressing the shutter. A bin cropped awkwardly at the margin, a bright window just behind the anchor, or a sign cut in half can pull attention away from the intended subject. You do not need to eliminate every irregularity; decide whether each edge detail belongs to the image’s idea.
Use the screen grid if your phone or camera offers one, but treat it as a reference rather than a rule. Placing an anchor off-centre can give its direction or surroundings room to matter. Centre it when the symmetry or directness is the point.
Pay attention to the background as carefully as the foreground. A pale wall can separate a dark object, while a tangle of cables may merge with its outline. If you cannot change the background, try a modest change of height or position before changing the subject.
How do weather and colour affect the walk?
Light changes what stands out, even when the street itself stays the same. Overcast light can soften shadows and make surface texture easier to compare; direct sun may create a strong patch of brightness that becomes an anchor of its own. Neither condition is automatically better. Ask whether the light supports your chosen point of attention or competes with it.
Colour can separate one object from its surroundings, but a colour contrast is only one route into a frame. If a red sign sits against pale stone, you may want the sign to lead. If the street is mostly one hue, use shape, scale or a break in the pattern instead of treating colour as a problem to fix.
On a phone, tap the area you want in focus when the camera app allows it, then look again at the whole frame. Bright screens can make shadows seem more open than they will appear elsewhere, so judge the relationships between light and dark rather than trying to make every patch equally clear. Follow your device’s own controls where their behaviour differs.
What should you ask after each frame?
Pause briefly after each photograph and look at it before moving on. The purpose is not to grade it, but to see whether the picture’s visual promise matches what you meant to make. These questions help turn a casual walk into a close reading of your own choices.
What do I notice first?
Name the first feature that catches your eye, without correcting yourself. If it is not the intended anchor, find the competing feature: perhaps a brighter patch, a face in the distance or a line that points elsewhere.
Where does my eye go next?
Trace the next movement through the frame. Repeated windows, a pavement edge or a gaze can lead towards the background; a hard crop or an isolated highlight can stop the eye instead.
What can I remove from the frame?
Look for an element that adds no useful context and distracts from the anchor. You may be able to exclude it by taking a step, changing height or tightening the frame, while keeping enough surroundings to show where the picture was made.
Does the frame show why I chose this anchor?
A close-up may show the object clearly but say little about its place in the street. Include a neighbouring shape, surface or direction if that relationship is what made you stop.
How can you compare the three pictures?
Put the images side by side in your camera roll or a simple gallery app. Do not rank them first. Notice which one has the clearest first point of attention, which one invites a slower look, and which one depends most on its surroundings.
You can also describe each frame in a short sentence: “The sign leads because it separates from the brick”; “the kerb carries the eye towards the corner”; “the bicycle belongs to the railing and pavement.” If the sentence only names an object, try adding the visual relationship that gives it a role.
Pay attention to what each image leaves out. A tight frame may make a familiar street feel abstract; a wider one may reveal the route or activity around the subject. Neither view is more truthful by default. Each makes a different claim about what matters in that small patch of place.
If the three images still look alike, the anchors may be too similar or the camera position may not have changed enough. Return to one frame and change the relationship: put the anchor near an edge, include a stronger background pattern, or move until a line runs behind rather than into it. Make the adjustment only if it clarifies what you want the picture to say.
How can you keep the exercise considerate?
A street is shared space, not a set built for a photograph. Keep doorways, pavements and shop entrances clear, and avoid framing private windows or identifying details when they are not needed. If a stranger becomes prominent, choose another moment or compose around the street feature instead.
Local rules and venue policies can differ, so check them where relevant. In ordinary public settings, courtesy still matters: lower the camera if someone signals discomfort, and do not follow a person to complete a composition.
Keep the finished set small. Three frames are enough to notice how an object, a line and a moment can organise one familiar street in different ways. On your next walk, change the anchors rather than simply repeating the same views; that small decision is often what makes a place look newly legible.